 Vanilla
 Cobblemon
You are using an out of date browser. It may not display this or other websites correctly.
You should upgrade or use an alternative browser.
You should upgrade or use an alternative browser.
Factions Server Guide
- Created by benj on
- 91 views
Complex Factions
A thread on how to get started on Complex Factions
A thread on how to get started on Complex Factions
Factions is a competitive fast paced, PVP game mode where players can fight to their heart's content and bring explosions to all who oppose them. Build farms and place spawners, surround them with walls as high as the build limit. Kill mobs to raise your mob tier and get higher valued spawners to dominate the FTOP leaderboard.
Keep other factions from blowing into your base and stealing your hard earned valuables, or play more subtle and make a hidden base to not be found by your enemies. Make cannons and use custom creeper eggs to wreak havoc on anyone faction, compete in 2 month long maps where it's all out chaos and destruction.
Learn more about factions with this guide and team up with your friends to conquer Complex Gaming Factions.
Getting Started
Creating a Faction and navigating the basics
Creating a Faction
To create a faction, begin by typing the command /f create <name>. Once you have done that, a confirmation message should appear in chat, notifying you the faction has been created. You are able to begin inviting other players to your faction, using the command /f invite <player>.Creating a Faction and navigating the basics
Creating a Faction
Recruitment
Don't want to create your own faction and want to just join one immediately? The option to do so is available using /recruitment or /lff to pull up the factios recruitment menu. From here, you'll be able to see factions currently looking for new members.To view currently recruiting factions, select the Factions Listings option which will show a list of all factions. It also contains their current player counts, placements, and age of faction. Additionally, you can also see individual players who have made applications under the Player Listings category. From there, you can see how players rate themselves in various categories along with timezone and other questions. This is a great place to put yourself out there for factions to contact you directly and accept your application.
Navigating Basic Commands
Once you have created your faction, you will now have the ability to customize many different aspects of your faction. Type /f, for a list of commands you can run inside your faction.Key Commands
- /f claim <radius> - Once you have found a spot you would like to build your base it is recommended that you claim the land surrounding. This will stop other factions from being able to access your land, To customize other factions permissions in your land you can use /f perms.
- /f unclaim - This will unclaim the chunk you are standing in.
- /f baseclaim - Once you have claimed your land you can turn this land into a base claim! This will stop the claims for being unclaimed after 6 hours.
- /f autoclaim - Will toggle automatic claiming. This means that wherever you walk/fly it will claim those areas.
- /f chat - This command will allow you to switch between Faction, and Public chats, To be more specific you can choose the certain chat you would like to type in. /f c f (Faction), and /f c p (Public).
- /f who <player name / faction name> - Will allow you to check who is in each faction, there are two ways you can use this command. Firstly, by typing the player's name to see which faction they are in along with all their teammates. Secondly, by typing the faction's name, you can also see all of the members. This command will allow you to see general information about the chosen faction. This includes: Leader, Allied, Truces, Enemies, Power / Land, Online Players and Offline Players.
- /f promote - Promotes a player in your faction to a higher rank within the faction.
- /f demote - Demotes a player in your faction to a higher rank within the faction.
- /f leader - Transfers leadership to a member of your faction (Leader Only)
- /f sethome - Allows you to set your factions home.
- /f home - Allows you to teleport to your factions home. This home is accessible by members you allow permissions to use this command.
- /f setwarp - Allows you to set a warp in your factions claims. Warps accessible by members allowed with the set permission.
- /f warp - Allows you to warp to an existing location, set in your faction's claims.
Faction Perms and Upgrades
- /f permissions - Allows you to give certain permissions to faction members and ally members. This can be things such as breaking blocks in certain claims, usage of chunk busting.
- /f upgrades - A list of faction upgrades that you can purchase via in-game money. These upgrades include things such as: Damage increase in claimed land, No Fall Damage in claimed land, EXP Drop rates increase, Increased faction member slots, and much more.
Claiming Land and Size Restrictions
- Claiming land can be done by using /f claim and /f baseclaim. A regular faction claim will last 12 hrs, whilst /f baseclaim is used for a permanent claim. Base shells can only be a max of 10x10. (chunks)
- /f map is used for finding other factions around the map to raid. Using /f map on will constantly bring up your map until you turn it off using /f map off.
Base Defense and Raiding
Understanding Base Building and Raiding
Understanding Base Building and Raiding
Base Building is a key aspect of our factions server. A base will protect your items / spawners from being taken or even blown up! There are two ways you can defend your base.
Firstly, you can build your base underground. Building your base is risky, as they can be easier to break into, but harder to find. Another option is to build your base above the ground, Chunk Busters are a great way to remove all blocks down to bedrock so you can have lots of room to build your base!
Protecting your base is vital, different walls/defense serve a different purpose when it comes to protection. Cobble and Sand walls are cheap and efficient, but are easy for someone who is experienced at raiding to get through. Obsidian walls are a great way to strengthen your base, these are very expensive but ensure you are well protected (This is due to obsidian having 3x the amount of durability as cobblestone).
Making sure to apply liquids to your walls also has a great advantage when it comes to stopping an attack, this is because creeper eggs cannot damage walls when they blow up in water/lava. This forces the enemy to build a TNT cannon to try get into your base, ultimately slowing down their attack! Once you have built a satisfactory base be sure to check your walls, being aware that a raid is happening increases your chances of stopping the attack drastically. A great way to check your walls for an active attack is by checking your sand walls, once a sand wall has been blown up it will drop to the bottom. Leaving a visible hole in sand walls at the top of your base.
Affective Defenses
- Regen wall
- A regen wall is arguably the strongest defense but very time consuming. There is a large variety of regen wall layouts that you can build. Here is a video on how to make a very basic regen wall, the water will need to be flowing and the lava will need to be source lava.
- Filters
- Filters are pillars that are placed every second block (horizontally and/or vertically). These are great to slow down fly machines.
Raiding and Cannons
Raiding a base has a lot of positives, you can take other players spawners and/or items for yourself! The tricky part is getting into the base. Players use raiding tactics such as cannons and fly machines or a mixture of both. The server offers ready to shoot cannons that automatically build themselves located in page #2 of /shop 2.Once inside a base you can PvP players inside, loot chests and even blow things up! Complex offers custom creeper eggs which each have their own unique ability that come at a cost.
- Creeper eggs - Spawn regular creepers that blow up when close to players as well as when hit with a flint and steel.
- Silent Creeper eggs - Make no noise upon blowing up
- Throwable Creeper eggs - Can be right clicked to be thrown in the direction you are looking, these are a great way to blow things up that are suspended in the air
- Throwable Charged Creeper eggs - Can be thrown into the air as well as have a much larger blast radius
Raid Events
There are a few types of raid events listed on the server. Use /raidevents to pull up a GUI menu with further information! There are currently 2 types, Daily and Bi-Weekly which each come with their own rewards that scale as the map continues. To view rewards and scheduling information, use the /raidevents command and over over the type of event.Citadel
To enter Citadel, use the /citadel command and select the concrete block at the bottom. From there, you will be prompted to build a seasonal item kit with tools and armor. Not that this is a limited time thing so you cannot sit for too long or it will auto select for you! Once selected, you will enter the citadel which is a custom map and your inventory will be filled with the selected tools, armor, golden apples, and potions to help you while pvping.
Your overall goal here is to stop other factions from capturing the point. This point will be shown to you in your HUD on the right side. It will also list capture progress, players here and in combat, and other useful information. Once the point is captured fully, the event will conclude and rewards issued.
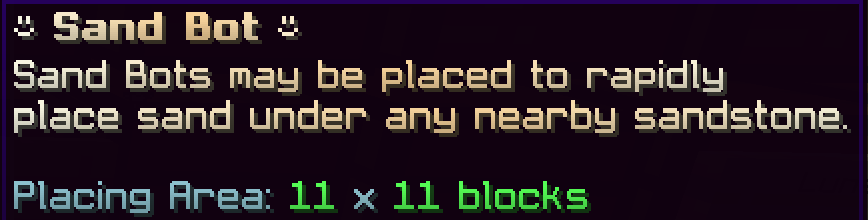
Sandbots
- Sandstone - Sand
- Andesite - Gravel
- Red Sandstone - Red Sand
- Concrete - Concrete Powder
- By right clicking the sandbot once placed you will be able to fill up the sandbot using money to begin printing the blocks, You can also disable the sandbot from printing whenever you'd like. Once your done using the sandbot you can right click it to despawn in and take back the remaining money it has not used.
Cannoning Server (/cannon)
Key features
- Protections blocks: We have three different explosion protection blocks that all act in a different way. Emerald blocks will protect all blocks above, below and the emerald itself. Coal blocks will protect all blocks above it as well as the block itself. Diamond Blocks will only protect the Diamond block itself (Great for worm platforms)
- Firing: /fire and /lever are new ways to fire your cannons. Once you right click a lever or a button on your plot, next time you attempt to use these items you can instead simply type /lever and/or /fire to automatically fire your cannon without having to click them continuously.
- Sand stack remover: Upon arrival to your cannoning plot, you will be given a Sand stack remover. Simply left a stack of sand to remove all sand above the spot you clicked. To respawn this item simply type /sandstackremover.
Raiding Outpost (/rpost)
Raiding Outpost, the Raiding Outpost will be a server wide raiding/pvp event where all factions compete to be the first to pull off a successful raid on the automatically generated base. After you and your faction have successfully claimed the raiding outpost you will need to protect it from other factions if you want to keep the perks/benefits controlling it comes with!Each week after the Raiding Outpost opens it will be completely unclaimed and available for every faction to attempt without anyone actively defending it, be sure to stay aware as other factions may attempt to stop your raid to take it for themselves. Once you claim the raiding outpost you will be given a 5% Shop bonus (+5% Per Rpost level). You will also gain access to the Golden Merchant inside the rpost. By interacting with this NPC you have the ability to trade Golden Shards for awesome rewards.
Basics
Basic stuff you can do to make money
Farming
Spawners
Mob Tier
On Factions, we have a Mob Tier leveling system in order to purchase spawners. When you first begin you will only be able to purchase endermite and chicken spawners from /shop. To unlock the other spawners and allow purchasing, you need to complete each Mob Tier below.- Mob Tier 1
- Chicken / Endermite
- Unlocked by default
- Mob Tier 2
- Pig & Cow
- Requires 10,000 Chicken/Endermite kills to unlock
- Mob Tier 3
- Rabbit & Slime
- Requires 20,000 Pig/Cow kills to unlock
- Mob Tier 4
- Skeleton / Zombie
- Requires 30,000 Rabbit/Slime kills to unlock
- Mob Tier 5
- Stray & Husk
- Requires 40,000 Skeleton/Zombie kills to unlock
- Mob Tier 6
- Magma Cube / Zoglin
- Requires 50,000 Stray/Husk kills to unlock
- Mob Tier 7
- Creeper & Spider
- Requires 65,000 Magma Cube/Zoglin kills to unlock
- Mob Tier 8
- Iron Golem & Polar Bear
- Requires 80,000 Creeper/Spider kills to unlock
- Mob Tier 9
- Piglin & Enderman
- Requires 105,000 Iron Golem/Polar Bear kills to unlock
- Mob Tier 10
- Evoker & Wither Skeleton
- Requires 150,000 Piglin/Enderman kills to unlock
Darkzone & Lightzone
Darkzone is an area where you can fight monsters for high level loot such as Runes, Gold Shards, Diamonds and more. Darkzone also has its own Outpost just like the Warzone Outpost but has a different bonus when captured. Be careful, Enemy players can come into the darkzone world and kill you to steal your loot and take ownership of the world.To enter darkzone, you will need to search through warzone for portals with the name darkzone entrance, Once you right click the portal you will be teleported straight to dark zone and ready to start grinding the mobs!
Lightzone is an alternate area where you can fight mobs for Runes, Spawners, Items and more! Unlike Darkzone, Lightzone does not have an Outpost but it does have different types of gear obtainable through killing mobs! This zone is specifically PvE, meaning you will not have to worry about other users attempting to combat you and steal your gear! To enter Lightzone, you can use the Lightzone NPC located at /spawn or run /lightzone! Once you click the emerald block, you will be teleported straight to Lightzone to begin your adventure!
Both Lightzone and Darkzone have corresponding commands of /darkzone and /lightzone which shows prefilled important information you'll need. The other thing to note is lightzone comes in 3 different tiers of difficulty T1, T2, and T3 which are all unlocked based on mobs killed. Each of these zones has scaling loot but darkzone has one set loot pile but is more difficult.
Value and Placements
How to get Faction Value and secure Faction Top / PVP Top
Faction Value
Faction Top
Faction Top is a great way to earn Store Credit for being a Top Faction with the most Value. Every 2 Months, Factions will reset and the Top 6 Factions who had the most value will receive Store Gift Cards. Current Top Faction Values can be viewed by doing /f top or by visiting /warp ftop. At the end of the season, the top factions will receive various rewards which can be viewed at the /warp ftop hologram.PvP Top (/pvptop)
PvP top is a great new way to receive end of season rewards for your faction. PvP top is just like Faction top but points are gained from different accomplishments within pvp areas. Killing players in netherite during Outpost and Darkzone outposts will gain you points towards your factions total. Capturing the two outposts will also gain you a lot of points. Be careful, dying in these areas will result in a reduction of pointsWarzone, Duels, and Envoys
All you need to know about PVP on Factions
Warzone
Duels
Envoys
Envoys are loot chests that drop in the warzone every hour. When an Envoy is dropping, you will be alerted in chat. Once the Envoy has landed, it will take 5 Minutes to unlock. During this time, players will attempt to kill you in order to open the Envoy and obtain the loot. Various items can be gotten from an Envoy including spawners, spawn eggs, mob tier pouches, and more. To view all rewards available do /envoys.Envoy Flares
Envoy Flares allow you to summon an Envoy into the warzone at any given time as long as another Envoy is not active. Envoy Flares can be obtained from crates or by purchasing from the auction house. When an Envoy Flare is used, an announcement will be made in chat that a player called in an Envoy. These Envoys will also take 5 Minutes to unlock with anyone being able to unlock them so be careful of surrounding players.Daily Rewards
Daily things you can do to get money easily
Voting
A quick and easy way to get money is by voting. If you type /vote in the game, a link will pop up in chat which will direct you to all 8 vanilla voting links when clicked on. Each of those sites will give out rewards to you when voting for the Complex Network. Once the vote comes through on the server you receive 1 Vote Key, $500, 5 Mystery Dust, and 5 Minutes of Flight Time per vote link. Voting can be done once every 24 hours.Daily things you can do to get money easily
Voting
Vote Parties
Vote Parties are an easy way of getting crate keys if you aren't wanting to spend money on our /store. Every 100 votes, a vote party will begin. You will be alerted with a message in chat that a vote party will start in 1 Minute. To check the status of vote parties, run the command /voteparty. When the vote party happens, you will be given 3 Vote Keys and 12 Blocks of TNT. You will also have a chance to get any other crate key available on Factions, with the exception of Limited Time Crates. In order to be eligible to receive rewards from a vote party, you need to have voted at least once within the past 24 hours. To check if you have voted in the past 24 hours, run the command /haveivotedtoday.Dailies
Extras
Special things available to you on Factions
Coinflips
To create a coinflip for IGM, GC, or items, first begin by typing /cf <amount>. This will open a menu, where you can confirm the currency you are wagering. To create a coinflip for an item, hold the item in your main hand and type /cf hand. This will then open a confirmation screen. Click the green glass panes on the left to confirm your wager, or click the red glass panes on the right to cancel. here you can also select multiple items to wager.
Infuser/Runes
We have a rune system which is our take on custom enchants. You can acquire runes through our infuser by doing /warp infuser. This merchant will bring up a GUI showing which runes you can buy. There are 4 tiers available for you to purchase:- Common - 3,150 XP each.
- Rare - 12,600 XP each.
- Legendary - 31,500 XP each.
- Mythical - 63,000 XP each.
Below that is the magnifying glass symbol. Here, you can identify the type, level, and chance of unidentified runes that you have found from the Rune Detector enchant. This enchant has a chance to drop unidentified runes when mining ores, with higher tier runes dropping from higher Rune Detector levels.
Next to the Rune Identifier is the clover symbol. This is where you can purchase Lucky Gems to increase the chance of your rune applying to your gear/tools. Each rune has a Success, Fail, and Critical Fail percentage. The more lucky gems you apply, the higher your Success percentage will be.
You can read more about Success, Fail, and Critical Fail percentages by hovering over the book with a question mark on it.
Next to that book, is where you can incinerate runes. Here you can destroy any unwanted rune and convert it into its XP value.
Lastly, are cleansing wands. Cleansing wands allow you to remove a single unwanted rune/enchant from any gear/tool. Cleansing wands will be consumed on usage.
Reset Vault
We have a Reset Vault that allows you to save your items so that you can use them after the map has been reset. Reset Vaults will be unavailable until an upcoming reset is announced for Factions. Once the Reset Vault has been unlocked, you are able to save items to it so long as you have an available slot. However, there are some rules that apply when saving items:- Once you have saved an item to your Reset Vault, it cannot be retrieved until the map has been reset.
- Stacked Items, Shulker Boxes, Spawners, Runes, Enchant Books and Pouches. cannot be saved to the Reset Vault - 1 item per 1 slot.
- Enchanted items will lose all their enchants when added to the Reset Vault. For example, a Diamond Pickaxe with Unbreaking 1 will turn into an unenchanted Diamond Pickaxe when you claim it from your Reset Vault.
- Seasonal items will keep all their base enchants when added to the Reset Vault, but not additional added runes or enchants. It is effectively returned to how the item was when first pulled from the seasonal crate.
Leaderboards
Leaderboards are a great way to earn Store Credit for purchasing ranks, crate keys, boosters, tools & more! Leaderboard Points can be earned by being in the Top 10 for any /leaderboard category. At the end of the week, the Top 12 players with the most Points are rewarded with Store Credit.Auction House
Another vital part of the game is the Auction House, in the Auction House you can buy/sell items that aren’t able to be sold or bought in the regular /shop like Tags, Runes, XP, Gold Shards, and more. Selling through the Auction House is an important way to earn extra income from rare/exclusive items players cannot get through the shop. The Auction House can be accessed by doing /ah while in game. Bought items will appear in your /ah collect.The Blacksmith
The Blacksmith is an NPC located at Spawn, or /warp blacksmith, whose main purpose is to allow you to restore durability on your gear, or restore it entirely if it is shattered (out of durability). In order to use the Blacksmith, you will need a Mending Glyph to restore durability, or a Reforge Glyph to restore a shattered item completely. Beware that these glyphs are not always guaranteed to work, as they have a chance to fail, making you lose a random rune, so it is recommended to max out the percentages displayed on the glyphs as much as you can using Lucky Gems before using them!We hope this can get you started on your journey to becoming a great Factions player! If you have any further questions make sure to ask the staff members that are online at the time, or the helpful community as they will be able to answer most of your questions!

Currently Viewing
Vanilla Wiki
General Information & Help
Partnership Guides
Complex Gaming
Check out our quick links for fast access to important locations on the forums!
Support Us
Check out our store to purchase ranks, items, and more!
Visit Store